Braies
Braies
Braies are a very tricky area to cover in reenactment. Medieval men wore them everyday, whether they changed them everyday is a very different matter!
They started out as long baggy items, a bit like baggy long johns, over time and with the advent of full hoes they became shorter. By the 15th Century, they are anywhere from normal knicker length to mid thigh. You often get a chance to see the longer ones in use first thing in the morning; not a pretty sight!
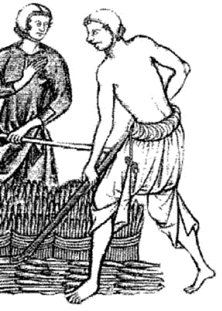
Their are two distinct types of braies during the medieval period: The first is shown in the vast majority of the pictoral evidence; with field hands wearing a knee length, baggy and bunched around the crotch version. Those wearing tight hoes would have found this style very difficult to wear.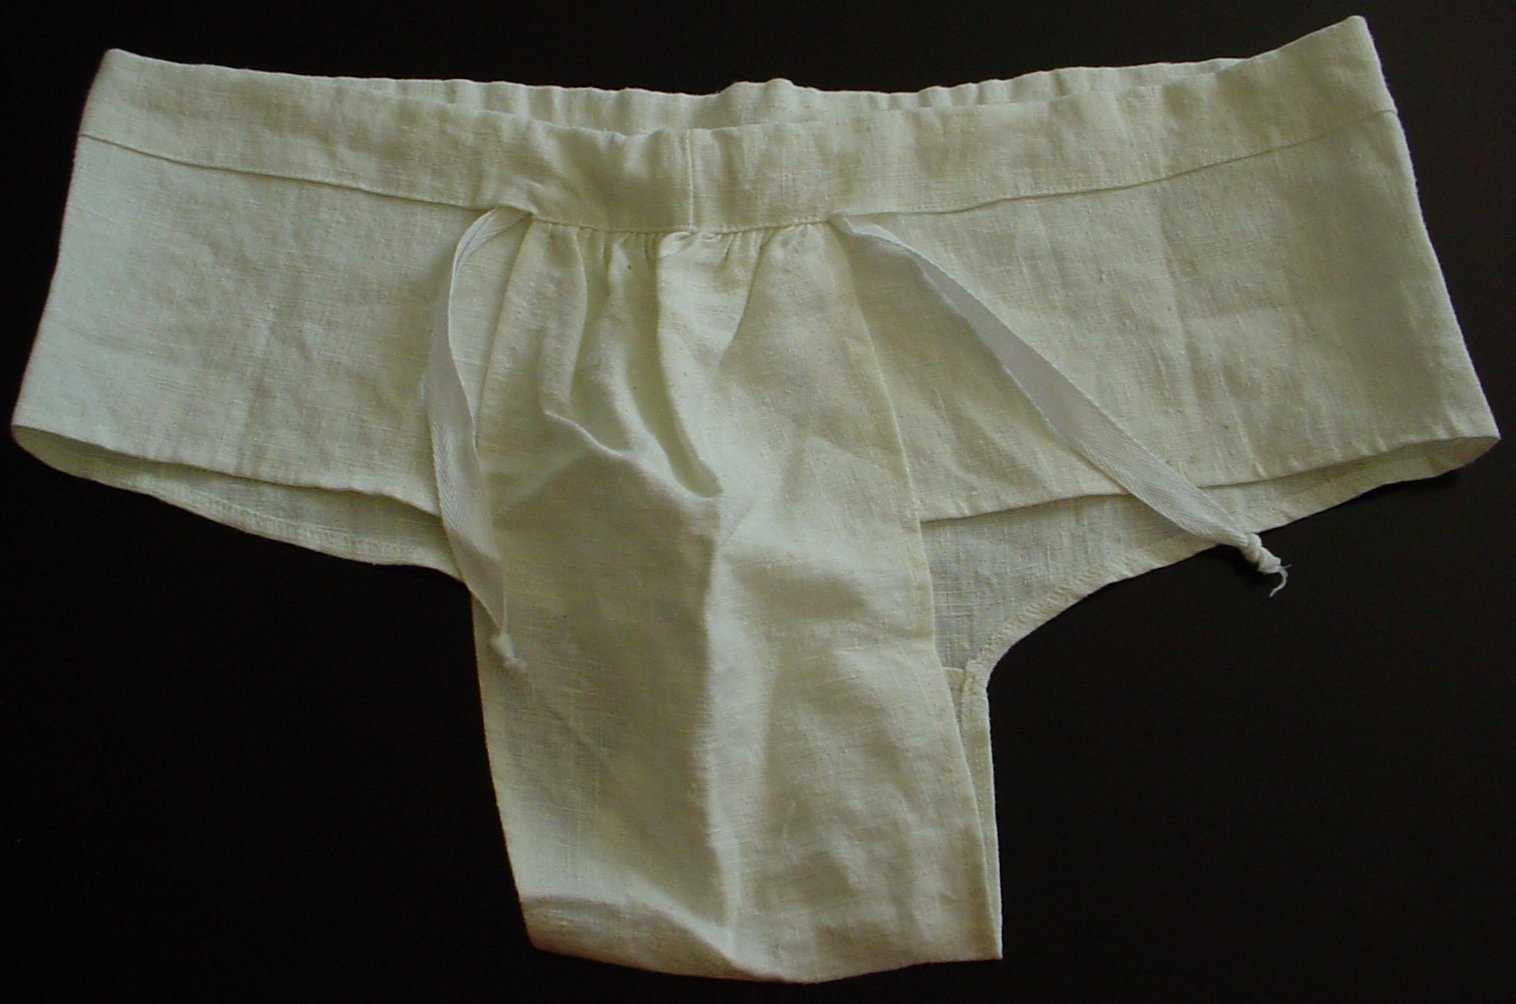
The second version is one most commonly found in religious imagery. These are similar to a modern Y-front shape, but they have a drawstring waist and a gathered pouch at the front to hold the genitals securely. These are very similar to Y-fronts shaping, but do a somewhat different job as they should hold you to the front rather than letting things wander about. This is necessary as there isn't room in hoes to arrange yourself anywhere but centre front. If you are being strictly accurate it is thought that this part of the braies should hang inside of the codpiece of your hoes; however, I don't know many sets of hoes where this is true.
They started out as long baggy items, a bit like baggy long johns, over time and with the advent of full hoes they became shorter. By the 15th Century, they are anywhere from normal knicker length to mid thigh. You often get a chance to see the longer ones in use first thing in the morning; not a pretty sight!
Their are two distinct types of braies during the medieval period: The first is shown in the vast majority of the pictoral evidence; with field hands wearing a knee length, baggy and bunched around the crotch version. Those wearing tight hoes would have found this style very difficult to wear.

The second version is one most commonly found in religious imagery. These are similar to a modern Y-front shape, but they have a drawstring waist and a gathered pouch at the front to hold the genitals securely. These are very similar to Y-fronts shaping, but do a somewhat different job as they should hold you to the front rather than letting things wander about. This is necessary as there isn't room in hoes to arrange yourself anywhere but centre front. If you are being strictly accurate it is thought that this part of the braies should hang inside of the codpiece of your hoes; however, I don't know many sets of hoes where this is true.
Now there many different theories on how braies should be made, I would suggest that you use the Y-front style; or you could try to interpret one of the historical drawings or paintings to come up with your own design. Remember whenever braies are depicted they are always shown as white.
Look at the following pictures and pattern and use these shapes as a guide to make fitted braies.
Look at the following pictures and pattern and use these shapes as a guide to make fitted braies.
Making Short Braies
Material: Fine linen; make sure it's not too scratchy Colour: White or off white.
-
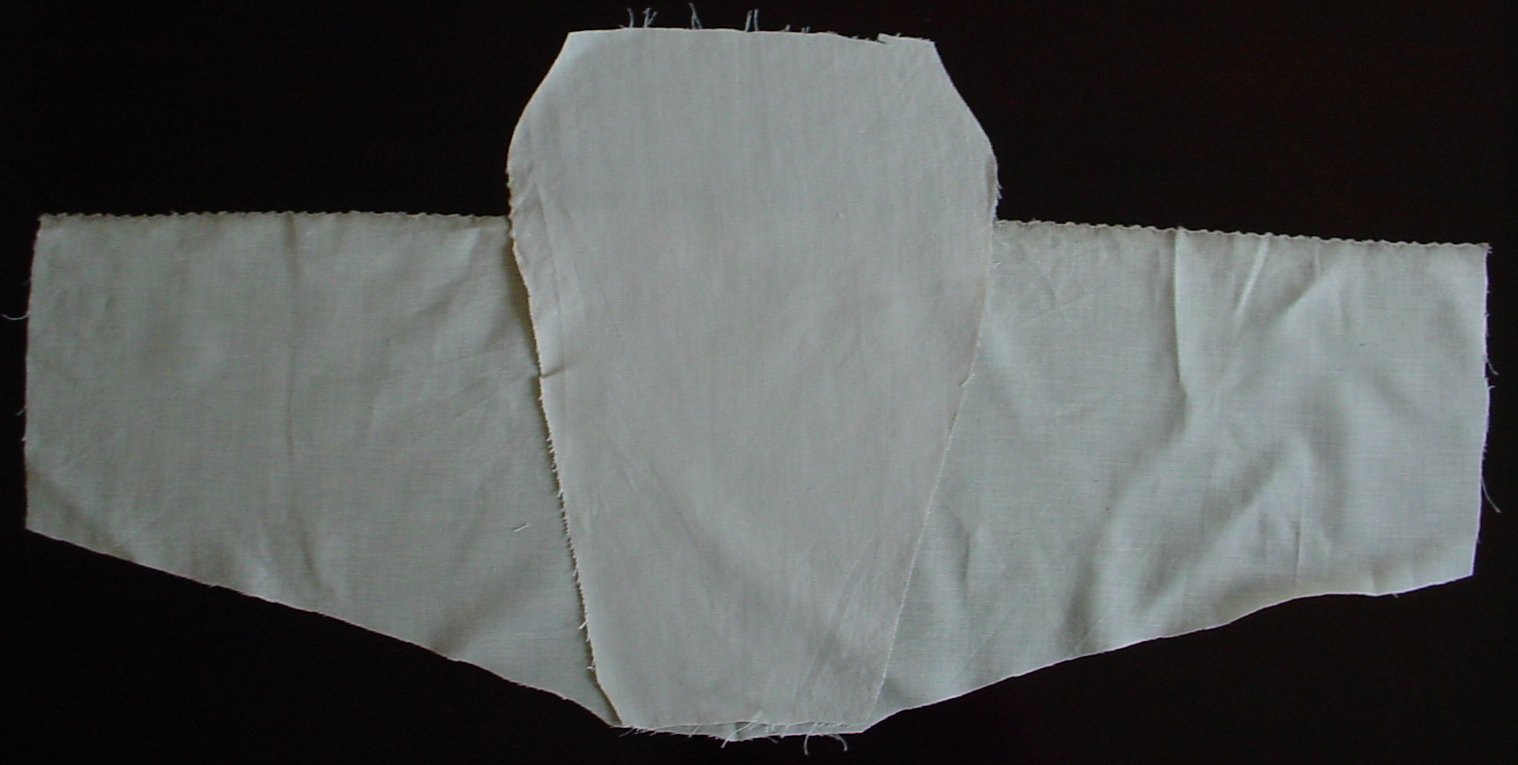
Measure your hip measurement and then add 5 cms. Draw this line on your paper. This will be the top edge of the bottom piece of material. The pattern pictures shown are the cut out pieces.
-
Then measure the distance from where you want your braies to hang around your waist to your coccyx area and add 5 cms, that will be the downward piece of the pattern. The shorter side is how deep on the hips you would like your braies to be. Then you need to add 8cm to the depth measurement for the folding (step XXX)
-
The Crotch piece shown is placed over the body piece. Measure from the center front point where you want your braies to hang, all the way under and around to your coccyx area. Add 5cm to this measurement. This will be the full vertical length shown on the top piece of linen. Notice how the bottom measurement is the same on both pieces. The top piece measures approx 10cm. Then draw a similar shaped curve.
-
Now cut out your linen. Sew the two bottom pieces of the each pattern together. Don't worry, this seam is supposed to be around your rear end. I would use the 'jeans stitch' here.
-
Join both ends of the braies together and sew approx 10cm down the seam. Don't worry that it is not completely joined.
-
Fold the top area of the braies over three times (2.5 cms each) This folded area will be for your drawstring (you may add your linen tape now). Iron the braies waist piece and sew the waist band flat. I would use the 'running stitich' here. Leave 10 cms free before each side of the central seem for the drawstring and crotch piece.
-
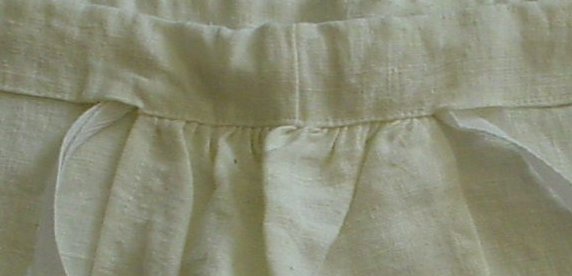
Pin up and pleat the crotch panel so it is approx 10 cm in length now, this should give plenty of room for you. Sew this in place.
-
At the side of the crotch piece on the waist band leave a gap large enough for the drawsting to pass through and sew up the rest.
-
Hem the all of the rest of the braies around the leg and crotch.
-
The inside may meet in the middle or have a slight gap, it is up to you. Lightly tack the bottom of the leg to the crotch, or you can sew the whole piece, it is up to you.
-
You may want to fine tune future patterns but that should cover you.
Making Baggy Braies
Material: Fine linen; make sure it's not too scratchy Colour: White or off white.
The idea behind these braies is that they are very easy to make, and they are once you understand how to make them, and they hide all of the necessary bits. These can be uncomfortable because of the excess material gathered around the groin. I think it would be possible to adjust the pattern slightly by cutting a triangle out of the center - but it is up to you and how brave you are feeling.
Basically you cut a tube, keeping in mind the measurments below, then add in the waist band to the middle of the tube, making sure that there is plenty of room for the drawstring. Your legs go through then end of the tubes, creating the excess fabric between your legs.
These go best with split leg hoes.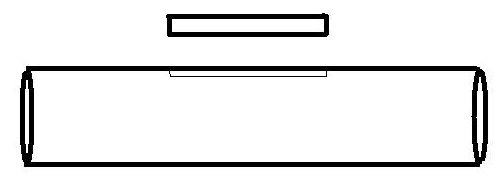


-
Make a note of all the measurements listed below. Waistline ____ Hip ____ Diameter of thigh just below crotch ____ Crotch (front of waistband to back of waistband) ____.
-
Length required (waist to thigh area) ____ X2 +5cm for hemming = ____.
-
This is where it gets tricky. You have to make sure that your waist band is wider than your hip/bum measurements, don't worry if you have to add a lot as you will have a drawstring.
-
You have to make sure that the diameter of your thigh and the crotch measurement are at least as big as each other. Add some moving aroung room to the larger measurement (10-15 cms).
-
If your hip measurement is substantially larger than your waist you will need to add extra to your waist measurement. You also need to make sure that you have some moving around room; 15cms or so.
-
Cut out the large rectangle given from your length required and crotch measurements.
-
Pin the tube together lenghways.
-
Cut out another rectangle of linen the waist/hip measurement + 6cms by around 10 cms deep.
-
Fold in each of the narrow ends of the waist band 3 cms each and iron flat (this is for the drawstring flap). Iron the waist band in half widthways.
-
Tuck in the edges of the waist band and then iron it flat.
-
Pin the waist band to the pinned together part of the tube. Removing the existing pins where necessary. Sew the inside of the waist band together, leaving the front open for the drawstring. Sew the rest of the waist band in place, making sure the waist band starts and finishes at the centre of the crotch area.
-
To hem the bottoms of the legs, fold the raw edge over by 1cm twice and pin. Then use the hemming stitch to finish..
-
Prepare the cording by measuring (use same material, string, linen ribbon or lucet weaving) the waist (or hip if larger) x 1.5 = draw string cording
-
Pass the cording through the waistband, I generally pin a safety pin to the cording for this job.
-
Note: If your first pair of braies doesn’t fit correctly – use them to find out where you went wrong, so you can adjust your pattern for the next attempt.
