Mens Hats
Hats 
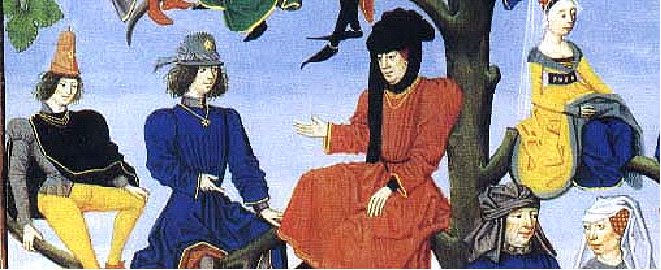
As with all fashions during the medieval period, the nobility set the trend while the lower classes tried to copy their look to show their own wealth.
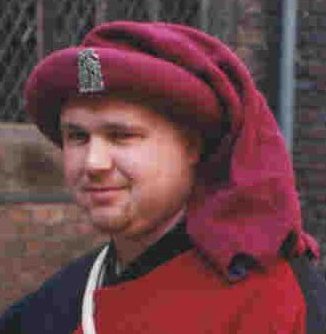
 From the information I have read on hats, the Chaperon is very popular from about 1400 to 1450 and changes very little in style over this period. However, as you get nearer to 1500 it becomes old-fashioned and is something only the old would wear. This hat can be made from the following pieces (see image). The top piece is the tail, which should be cut out as one piece and sewn down the side - point it at the bottom if you wish - and as long as you would like (some would even reach your bottom). The middle section is the main hat piece, which should be the length of the widest part of your head plus approx 15cms. Sew this piece into a tube - checking that it fits on your head. The depth of the material is up to you, but I would recommend that at least 40cm would be needed if it is to hang well. Now the hardest bit to get right for me is the wide brim which holds the hat together. You could either roll the wool, until it has the desired thickness, or stuff a tube with wool - I would recommend the first although this would make the hat slightly heavier. Sew the rim piece together down the length first and then attatch the ends so it makes a good shape on your head. Rotate the rim so the seam is on the inside. Sew the tail and main body to the rim piece, next to or on the rim seam, this will allow you to keep it tidy. This hat does not need to be lined, but it can be. It could also be dagged too.

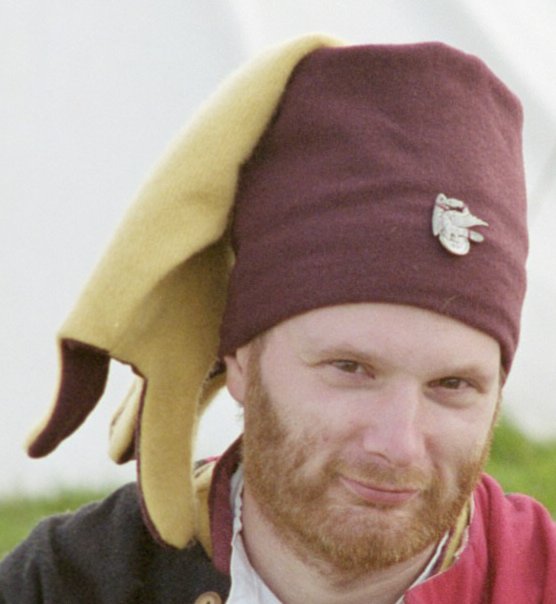
 This is a great hat too, it is simple to make and it can be made in opposing colours, or one colour. Basically cut out two large circles, one of wool and one of linen. Then cut a rectangular piece of wool to be slightly longer than the circumference of your head. Fold this piece in half width ways. Place pins in the rim piece and the circular pieces marking the four quarters, then pin the outside piece to the rim, matching up the pins, this will be used to make sure your pleats are spread evenly around the hat. Pleat the outside and sew around the rim. Do the same with the inside. Iron and starch the rim band.
 This hat can be bought for a reasonable sum, I don't know how to make it but I do like it.
 Well, this is the basic straw hat, everyone should get one to keep the sun off you at very hot events.

As with all fashions during the medieval period, the nobility set the trend while the lower classes tried to copy their look to show their own wealth.
There are many different types of hats that were worn during our period: wide-brimmed straw hats for field work, small plain hats, large ornate ones, even particular hats for guilds or religious groups. Obviously, I cannot cover every type of hat men would have worn in this guide, so I will include a couple of the more basic hats and pictures of the more complicated ones. Or you could have a look at some period pictures and find a hat that you like better. Remember, as material during the medieval period is a valuable commodity and a very good way in which to show your wealth, the hat and the clothing that you wear would make an impression on those around you.
If your outer doublet has plenty of material, your hat will probably made of lots of fabric. If your doublet is tight fitting, your hat will also be more structured and formal.
The hats shown here can be made from common materials, such as linen or fulled wool. I would recommend that all men make a close fitted hat that they can use for an arming hat to go underneath their helmets. I would recommend that you buy rather than make the more complex hats, such as felted ones, as they are reasonably cheap.

The Chaperon Hat
 From the information I have read on hats, the Chaperon is very popular from about 1400 to 1450 and changes very little in style over this period. However, as you get nearer to 1500 it becomes old-fashioned and is something only the old would wear. This hat can be made from the following pieces (see image). The top piece is the tail, which should be cut out as one piece and sewn down the side - point it at the bottom if you wish - and as long as you would like (some would even reach your bottom). The middle section is the main hat piece, which should be the length of the widest part of your head plus approx 15cms. Sew this piece into a tube - checking that it fits on your head. The depth of the material is up to you, but I would recommend that at least 40cm would be needed if it is to hang well. Now the hardest bit to get right for me is the wide brim which holds the hat together. You could either roll the wool, until it has the desired thickness, or stuff a tube with wool - I would recommend the first although this would make the hat slightly heavier. Sew the rim piece together down the length first and then attatch the ends so it makes a good shape on your head. Rotate the rim so the seam is on the inside. Sew the tail and main body to the rim piece, next to or on the rim seam, this will allow you to keep it tidy. This hat does not need to be lined, but it can be. It could also be dagged too.
The Richard III style hat

This hat is very easy to make and many of the men have been known to wear it as their arming cap too. Cut pieces to a size you think is approprate for your head. Remember that the pieces on the outside are repeated on the inside. Sew the inside pieces together, then the outside. Line up the seams. Sew the rim pieces together with the seams on the outside (good sides on the inside), leaving a small 5 cm gap to pull the material through to the correct way around. Then, using the overcast or hidden stitch, sew the remainer.You can use linen and/or wool for this hat. As an alternative you could make the outside of the rim appear in a v shape as shown in the pattern above.


The Fez
(awaiting picture) I love this hat! It can have several variations in height and it can also be trimmed with a contrasting material like fur. This hat is made from stiffened felt, other than this I do not know how it is made, so I would suggest that you buy one if you would like one.
Not the Golfing hat!
 This is a great hat too, it is simple to make and it can be made in opposing colours, or one colour. Basically cut out two large circles, one of wool and one of linen. Then cut a rectangular piece of wool to be slightly longer than the circumference of your head. Fold this piece in half width ways. Place pins in the rim piece and the circular pieces marking the four quarters, then pin the outside piece to the rim, matching up the pins, this will be used to make sure your pleats are spread evenly around the hat. Pleat the outside and sew around the rim. Do the same with the inside. Iron and starch the rim band.
 This hat can be bought for a reasonable sum, I don't know how to make it but I do like it.
The Straw hat
 Well, this is the basic straw hat, everyone should get one to keep the sun off you at very hot events.
 I don't really know anything about this type of hat, but I thought that I would include it as I like the look of it.